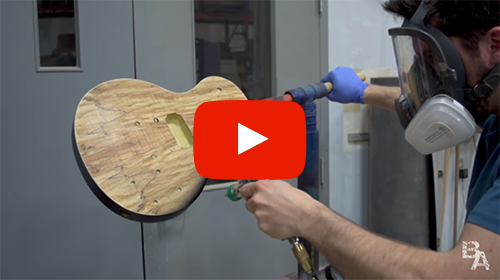
Interested in refinishing your guitar? Stick around as Brad Angove walks
you through the steps to build this custom guitar for Darrel Braun,
fellow YouTube guitar enthusiast. The tutorial takes you through
the first to final step on how this Spalted Maple Les Paul build
was born using a handful of products, including some Mohawk and
Behlen guitar refinishing products. To watch the full video, click
the image below.
First step- Make sure the neck and body from the guitar kit fit
snuggly together. Since both assemble perfectly, Brad's ready to
prep the surface for his custom finishes. Starting with a 600-grit
sanding block to remove the existing sealer from the surface, Brad
then cleans the area using some
Wax Remover (available in aerosol and liquid in
1 quart and 1 gallon on our industrial website).
Next Brad goes in with masking tape and covers the areas he
doesn't want the sealer to settle into. Now the guitar is ready for
the finish. Don't forget to put on your face mask and gloves to
protect yourself! Brad evenly applies Behlen Vinyl Sealer to the
entire body of the guitar using a spray gun, which dries quickly
and leaves a satin finish. No spray gun? Don't worry-
Behlen Vinyl Sealer is available in a handy aerosol can for
quick and even application.
After letting the sealer sit for a couple hours, Brad goes in
with his sandpaper to ensure the surface is smooth and ready to be
painted. Follow up with some Wax Remover, and your guitar is ready
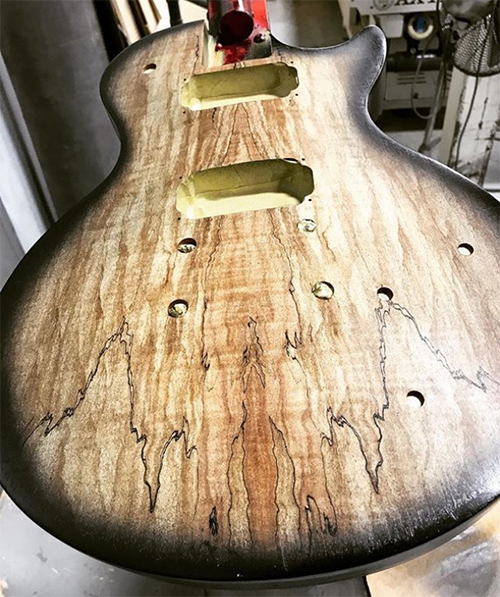
for color. Going off an image for inspiration, Brad sprays black
acrylic to the back and sides of the guitar body creating the start
of a sunburst finish.
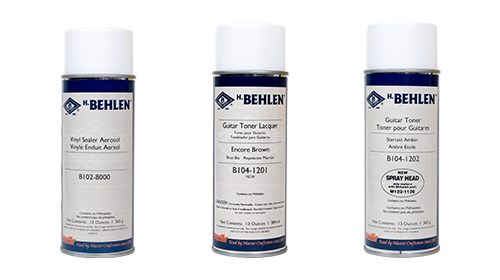
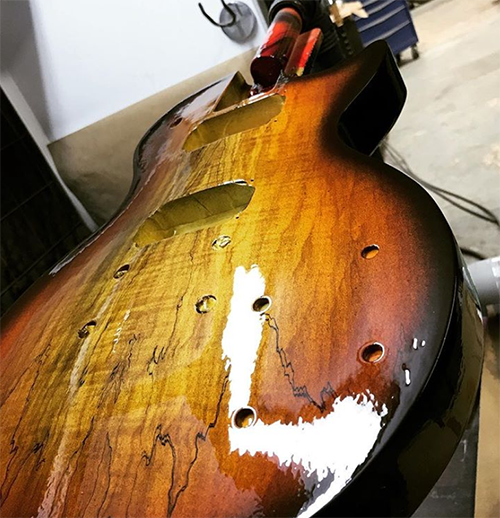
To finish the sunburst design, Brad mixes Behlen Stringed
Instrument Lacquer, liquid stain, and some aniline dye pigment. If
you'd like to stick with pre-tinted aerosols, our Guitar Toner in
Starcast Amber paired with
Encore Brown achieve the same natural fade design. Need help
tinting your lacquer? Brad has the answers.
What type of finish you want to use to protect your guitar is up
to you. We recommend following up with several coats of
Stringed Instrument Lacquer. In this instance, Brad decided
that polyurethane would achieve a glossier and durable finish for
his customer's intended use.
Onto the neck of the guitar- Using Tung Oil, evenly rub the
product into the wood grain and repeat. The color begins to develop
to a satin sheen that looks natural to the original wood color.
With the 1500-grit paper, carefully sand the edges and sides of
guitar for a smooth finish. Gradually increase your grit to up to
5000-grit so the guitar is ready for the polish.
Now THAT is one beautiful build. Thank you to Brad Angove for
taking us along on this journey and getting to see firsthand how to
achieve those dream custom guitars using some high-quality
products, talent and hard work.
Interested in learning more about our guitar refinishing
products? Head over to our
Guitar Repair product page or email us at
info@mohawkconsumerproducts.com. See you next time!
Find us on Facebook
| Twitter | instagram.